Out Of The Archives – Telescope Tales

I’ve been amusing myself this evening scanning old black & white negatives and colour slides into the computer: strips of film that have languished in negative files on top of cupboards for years.  It’s a boring process, but punctuated with the reward of finding something I thought was lost, or a negative that was never printed.
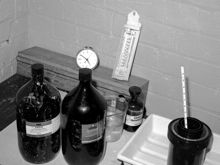
developing tank developer fixer darkroom
Home developing. This is how we did it….
developing trays darkroom
when I were a  lad…..

Some of the pictures go back to 1973, and are an unwelcome reminder of my antediluvian origins.  But they’re also revealing of the state of technology at the time, and what I was doing with it.  All the black and white pictures in this post are from the archive.
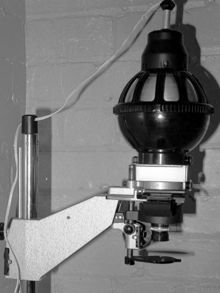
zenith enlarger
This is not a telescope

The photographic process itself is a prime example: the relative time  and cost of developing and printing my own films being one reason many pictures haven’t been properly seen until now.

Things sure have moved on.  I asked my 15 year old nephew if he’d ever used film, and after clarifying I didn’t mean video tape, he confirmed he’d never touched the stuff.  Silly of me to ask really.

Regrettably, some of the more fun, not to say embarrassing, pictures from the archive are not suitable for public display.  But I’m happy to inflict the sci-tech oriented discoveries – starting today with these pics of my first serious astronomical telescope.
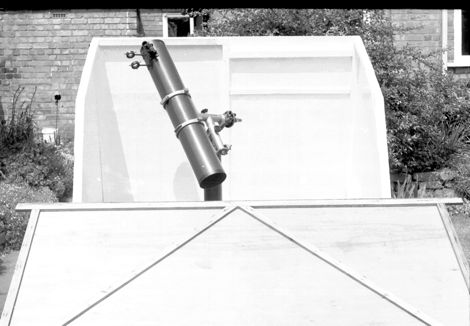
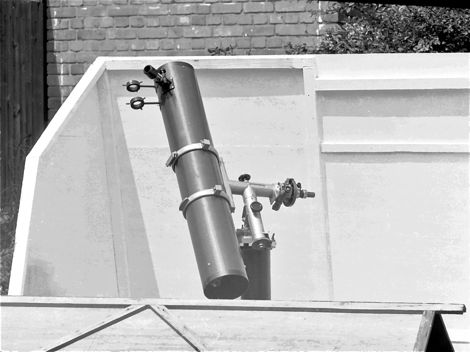
fullerscopes six inch reflecting telescope
Same paint job as the 200″ on Mount Palomar

The main components were bought in 1977, and this photo of the telescope in its observatory is probably from 1979.  The instrument is a classic Newtonian reflector of a design that hasn’t changed in hundreds of years.  It has a 6″ primary mirror, and was built by Fullerscopes of London, the same company that made Patrick Moore’s fork-mounted 15″.  The mount is a Fullerscopes Mk III German Type equatorial.  The ancillaries: motor drives, plinth, finder, camera attachments, and the observatory itself are home built.

fullerscopes six inch reflecting telescope

To be accurate, this was my second telescope, the first being an entirely home-built open-tube reflector in an altazimuth type cradle.  Constructed almost entirely from sturdy aluminium bar stock – largely because that’s what I had – it all proved a little unwieldy.  No photos survive – probably for the best.
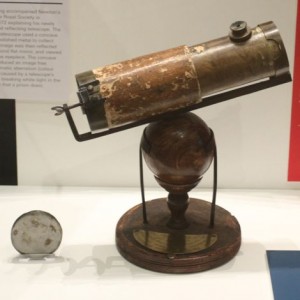
Reflecting telescope made by Isaac Newton (Photo:Tim Jones, taken at the Royal Society)
Made by Newton (Photo:Tim Jones, taken at Royal Society)

The 6″ was mainly used for visual observations.  I later added an improved synchronous motor drive to the Right Ascension (RA) axis to make the instrument more suited to astrophotography, but as that happened in 1980, just before I left home for university and ever on, that feature was little used.

Warning – Telescope building aficionados, engineers, (and all other interested readers….!) only

Assembling, augmenting,  or building a telescope from scratch is an excellent engineering, as well as scientific, training.  To save money, I purchased only the RA axis worm drive from Fullerscopes, with a view to reverse engineering it and building a copy for the declination axis. Operations to do that included aluminium casting, worm screw cutting, and making my own integrated roller ball-bearings on the worm shaft (to remove any trace of play, and hence instrument movement).   Thankfully, my brother was building a model steam engine at the time, so a good selection of machine tools were available around the home.
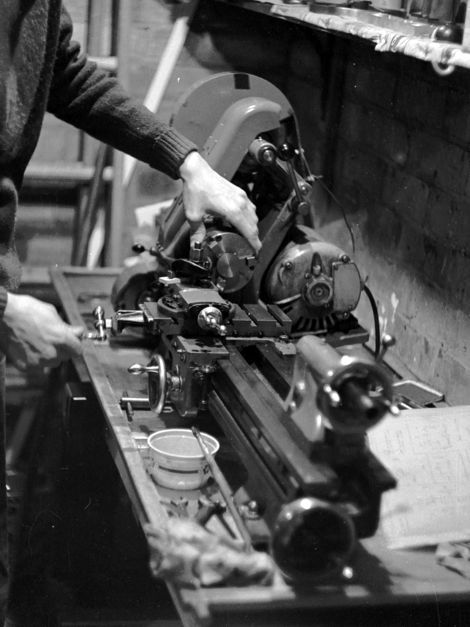
Myford ML7 lathe. Every home should have one (here operated by my brother).

I realise now that some of these operations were quite sophisticated engineering tasks, particularly for a 15 year old – probably why things didn’t always turn out as planned.  I struggled to reproduce the 4.5″ phosphor bronze worm wheel (although the trick for cutting a worm wheel, by winding a tool-post mounted wheel into a spinning tap mounted between lathe centres, I find fascinating and elegant), and instead adapted an ex-military gun-sight for the declination axis.  That said, the worm unit I’d made was better than the original, and eventually replaced it.
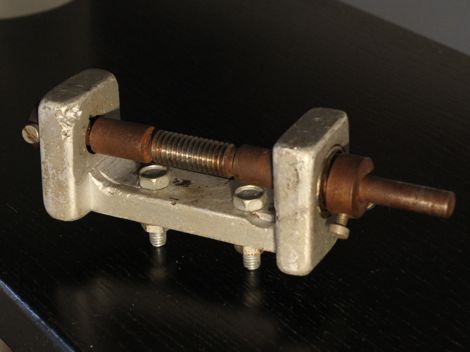
screw-cut worm in ball-races / cradle
Great British engineering….

The RA motor connected to the drive worm via a gearbox, also homemade using mecano gears mounted in a solid block of steel, the centre of which had been milled out on the lathe and fitted with individually turned and reamed phosphor-bronze bushes.  The whole drive assembly was bolted to the plinth and linked to the final worm gear on a universal joint.  This all worked fine, unless the telescope was incorrectly counter-balanced, when teeth would expensively shear off the little mecano gear wheels.

Moon

Despite these set-backs, or perhaps because of them, it’s my firm belief that this activity set me up well to tackle life’s later challenges: like building my own research equipment and mending the car.

The telescope’s plinth and observatory have their own stories.  I’d read somewhere that telescopes need a rock-solid mount, and that plinths mounted in concrete are superior to tripods.  In the photo, you can just see the top of a 5ft x 5″ x 1/4″ steel tube, 2 ft of which is buried in a 3ft square cube of concrete.  The base of the observatory is covered in paving stones laid on sand, with a gap around the central concrete block to prevent footstep vibrations reaching the plinth.  The plinth was capped by a 7″ square x 3/8″ thick oxy-acetylene welded plate.  I remember this well, as the welder had to commission an unusually large nozzle for the job.  This was of course total overkill for a 6″ reflector; but I suspect I harbored secret fantasies of some day owning a more substantial instrument.

Lyra

The observatory was made from resin bonded plywood on a pine frame.  Originally designed as a run-off shed, I switched to the fold-off roof idea when the weight of the structure dictated a need for major railroad-type work adjacent to the observing area – effectively doubling the project’s footprint.  In practice, a south-facing aspect and relatively low observatory walls meant the compromise solution made little impact on sky visibility.  A telescope mounted permanently out of doors is always ready for action – an important consideration with UK weather –  with no need to wait for thermal stabilisation of the optics or to spend time aligning the equatorial mount.   It goes without saying that, like all the world’s great observatories, it was painted white.

I keep saying ‘was’, because Mount Tim was decommissioned in the early nineties, such that you’d never know the paved area had ever  been anything other than a regular garden patio.  Amusingly, the plinth proved immovable, save for the use of explosives, so was instead ceremoniously tipped on its side in a shallow grave.  I sometimes wonder what a future Tony Robinson might make of it.

Coming back to Fullerscopes.  Buying a telescope in 1976 was not like popping down the road to Curry’s and carrying it home under your arm.   When my father and I first visited Telescope House on the Farringdon Road, we were greeted by Dudley Fuller in person.  He’d formed the company a few years earlier by buying out the historic but failing maker of optical instruments – Broadhurst & Clarkson Ltd.

We talked about my telescope-making efforts to date, and what I needed from Fullerscopes.   He was wary of my plans to attach one of his diagonal mirrors to my homemade spider using glue (EvoStick No.2 – if I must!), but we agreed a package – including a Fullerscopes spider – and placed the order.  (The spider sits in the top of the telescope tube and holds a diagonally placed mirror that diverts light into the eye-piece.)  A month later, I returned to man-handle this tribute to Sir Isaac through the streets of London and back to Leicester  – by train.
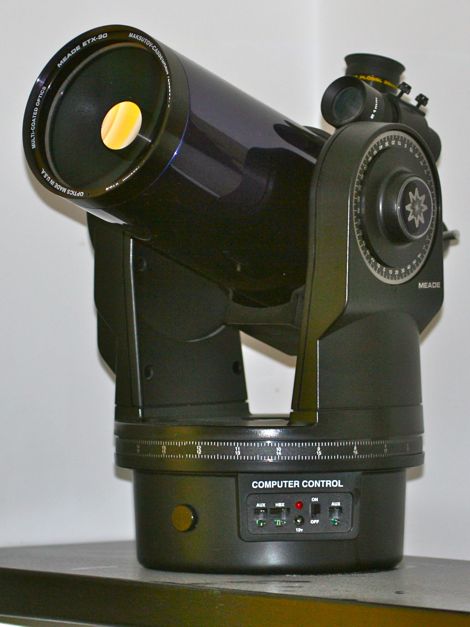
What I’m using today: Meade ETX-90.

Telescope building was still being done in a traditional way.  Fuller explained that all the brass tube-work on his telescopes was hand made using Broadhurst & Clarkson’s original equipment.  That meant the brass sheet was rolled on an antique mill by hand, then soldered along the seam.  On my telescope, the solder seam is visible on the brass focusing mount and Barlow lens adapter tube.  The economics of this, particularly on parts destined for smaller instruments like my 6″, and at a time when Japan was starting to export mass-produced alternatives, must have been unsupportable.  I’m guessing that’s the reason the Farringdon road shop closed down in 2005 and Telescope House moved out of town.  It looks like they’re still trading though, with Patrick Moore’s endorsement into the bargain. (Telescope House website).  But they don’t seem to be making their own instruments any more – please correct me if you know different.
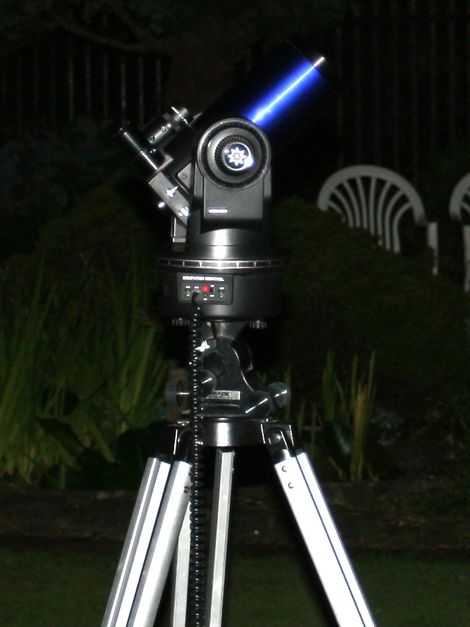
Meade ETX90
Meade ETX90

There’s a related and slightly surreal twist to the story here, concerning my move to London in 2000.  Needing a more portable telescope for out of city viewing, I visited Fullerscopes, now the UK agent for Meade Instruments Corp. of the USA, makers of the compact Cassegrain-Maksutov telescope I was after.  The odd thing was, when I got chatting to the guy who handed over the box, it turned out he had personally been involved in making the brass-work for my 6 inch reflector 24 years earlier!  It’s a nice story.

Anyhow, I hope that wasn’t completely boring and self-absorbed.   If nothing else, it may have given you an insight into what I was getting up to in my formative years.  You know, when I should have been out doing drugs, smashing up cars, and getting my underage girlfriend pregnant – like a normal teenager 🙂

Don’t forget to check back for the next exciting edition of Out Of The Archives……
Let’s Make A Comet

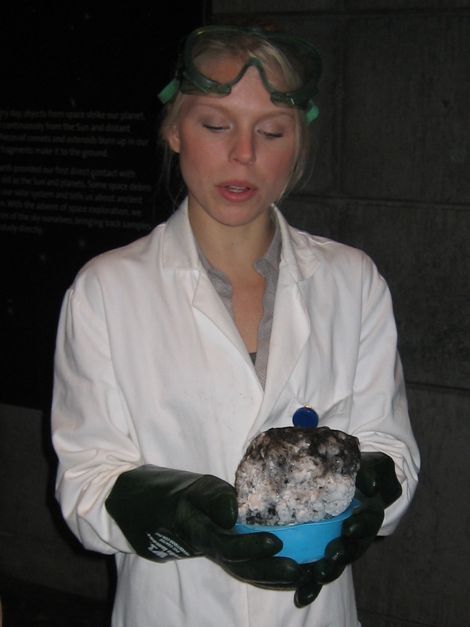
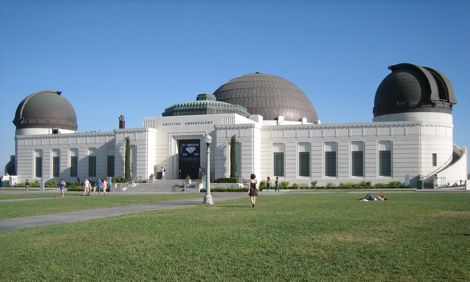
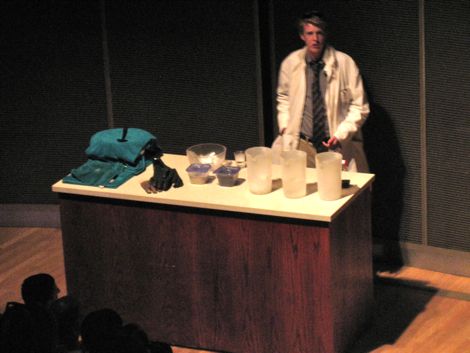
Having unaccountably failed to spot comet McNaught on its recent visit, I was compensated last week by a meeting with this artificial comet created at the Griffith Observatory .

comet
Demonstrator Grace holds the artificial comet (Photo:Tim Jones)

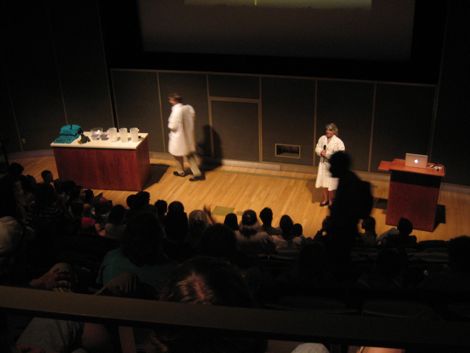
Demonstrator Grace is holding the tangible product of last Friday’s  ‘Let’s Make A Comet’ event, held in the Griffith’s Leonard Nimoy Event Horizon Theatre.   And I have to say, it was one of the best half hour’s worth of science communication I’ve seen.

I think the shear fun value had a lot to do with it.  And although the show was geared to a young audience, there was no dumbing down of the science or talking down to the kids.  Presentation style and jokes were witty rather than silly, patronising, or childish; and references to popular culture, like Harry Potter and the Transformers movie, were entertaining but topic-related.  The professionalism of the two demonstrators / presenters really made the show, and it’s taking nothing away from the scientific knowledge and skills these guys have, to say they were genuine entertainers.

The comet was made by mixing together common substances containing the elements found in real comets.  So that meant shaking up water, sand, carbon, and cleaning fluid (ammonia) together with dry-ice, or frozen CO2, in a plastic bag; the details are here on Griffith’s Teacher Resources page.

Griffith Observatory (Photo:Tim Jones)

I liked the hidden plan to pull an audience in on the promise of seeing a comet being made, then to educate them on broader themes and related topics; the practical demonstration happening only at the end of the session.   There was nothing sinister in that though, and it all went down well with the bulk of the show taken up with a mix of talk, slides, videos and Q&A breaks.  A lot of ground was covered, ranging from the chemical and physical requirements for life, to how the solar system is thought to have formed, and a pretty good introduction to astrobiology – including a discussion of extremophile life-forms.

Lecture theatre events are inevitably going to be a little one-way, but there was good engagement through the Q&As and frequent questions back to the audience. And it’s not like this was a public consultation on the risks of nanotechnology, the material being relatively uncontroversial.

Having the finished item available for inspection after the show was a big plus, and I’m sure the memory of it will for many people be a lasting anchor for the science they picked up.


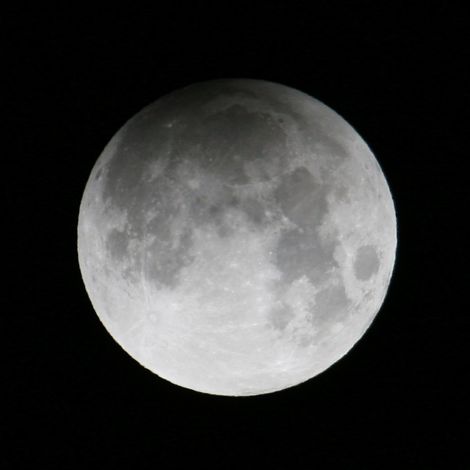
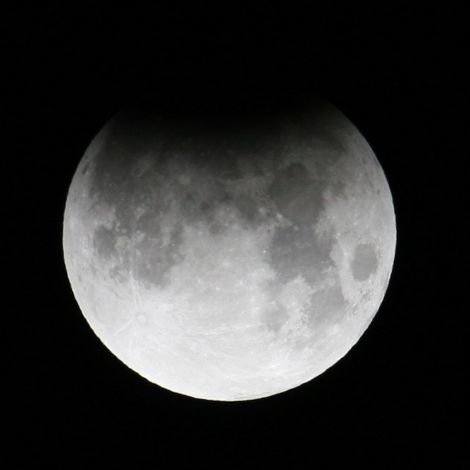
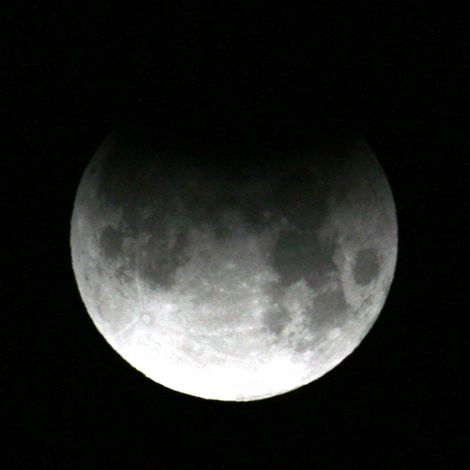
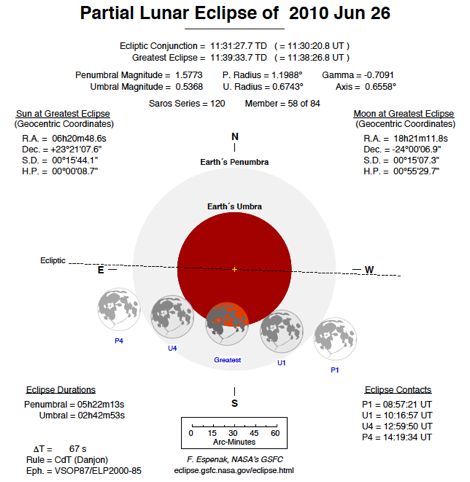
Partial Lunar Eclipse 26th June 2010

Here are the three pictures I got early this morning before cloud set in.

The last in the series was taken at 10:35 UTC, about an hour before greatest eclipse at 11:38 UTC – when more than 50% of the moon was in eclipse.  Location – Los Angeles.  I suspect the colour fringing in the last shot is a camera artifact, rather than an atmospheric refraction effect, as the frame is exposure enhanced (to counter a rapidly misting sky).   :

3:09 PDT (10:09 UTC)
3:29 PDT (10:29 UTC)
3:35 PDT (10:35 UTC)

Source:NASA
Source:NASA

ISS Pass In Front of Moon

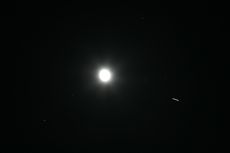
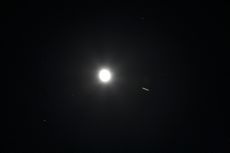
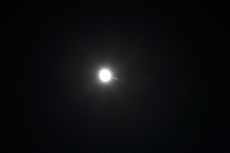
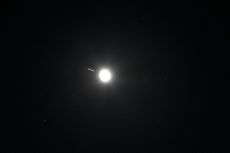
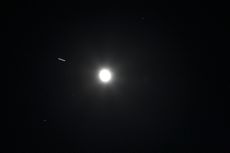
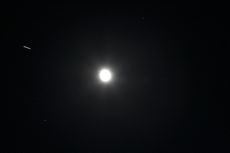
Here’s a nice sequence of exposures showing the International Space Station passing in front of the moon.  As seen from Los Angeles, 21.16 hrs on 23/06/10.

There’s no fixed interval between frames – just as fast as I could click, which is about 1 per second. Canon 30D 100-400 L zoom at 100mm. 0.6 seconds, f 7.1. 800 ASA.

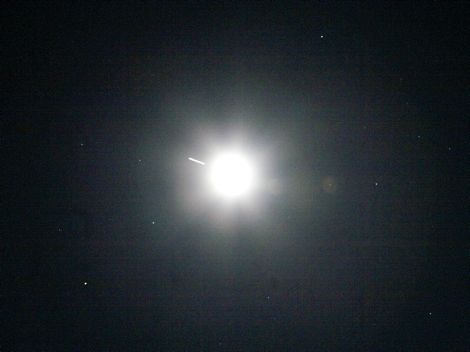
Here’s an enhanced pic, just to bring out the stars in Scorpio, including red supergiant Antares at lower left.  M4 and M80 are invisible in the flare there somewhere.

Moon and ISS in Scorpio
ISS trajectory (credit:Heavens-above.com)

The Cricket Thermometer – Fact or Fiction?

Can you tell the temperature from how fast crickets chirrup in the evening?   Neil deGrasse Tyson thinks so, according to this Tweet yesterday evening:

thermometer

Sounds like a great idea, and as I’m in the foothills of the San Gabriel mountains – cricket central by my standards  – I’ve tested tested out the theory. 

Dr Tyson is not the first person to suggest you can tell the temperature with a cricket, and he’s only having a bit of fun, so in the worst case he’ll be guilty of spreading, rather than generating, misleading information ;-).

Armed with a  digital recorder and a laboratory thermometer, I quickly found a suitable subject.  The temperature read 65 degrees Fahrenheit.   This is what the chirruping sounded like:

Press the arrow key:

– Cricket at 65F, 20.40hrs

From this sample, using only my ears, I counted 67 chirps in a 15 second period (it’s tricky counting that fast, but I found I could do it by checking off groups of 8 chirps on my fingers).  According to Dr Tyson’s formula, that gives a temperature of 67 plus 40 = 107 F; a whole 42 degrees above the actual temperature.

Why the difference?

We’re doing science here, which means there’s a whole load of stuff to check out before rushing to condemn Dr Tyson for inaccurate tweeting.

  • Was it indeed a cricket I was listening to? Sounded like one, but I didn’t actually see it.
  • Was Neil referring to a specific type of cricket, but the 140 Twitter limited the detail he could provide?  If he’s missed out a division factor of 2 on the cricket count, that would put my number in the right ballpark.
  • Did I listen to the cricket long enough?  Was it in a cricket warm-up or warm-down mode?
  • Was my thermometer broken?  Ideally I’d have two or more to check, calibrated against a standard.  But I don’t think it was the problem.
  • Could the cricket be hiding under someone’s air-conditioning unit outlet?  This isn’t so far fetched actually.  We have one in the house at the moment living under our fridge because it’s warm.
  • Was my sample large enough – both in terms of number of recordings and number of crickets?  I did make four separate recordings and (for now take my word for it) they were pretty similar.  That said, I should really come back over a number of evenings at different times to be sure – right?

Well, in the longer term the sample could get large, as I’ll probably be listening out for these things obsessively for the rest of my life now.

What is a chirp?

Meantime, I wondered if the explanation was down to the definition of a ‘chirp’.  I convinced myself the chirps I had recorded might be doubling up; maybe something the cricket was doing with its legs: ‘chirp-chirp’, ‘chirp-chirp’, etc. – each ‘chirp-chirp’ counting as one ‘chirp’.  Are these double chirps that Neil counted as single chirps?  Was it an issue of resolution and my ears?   To find out, I slowed the recording to 0.19 times its normal speed and re-recorded a sample to get this:

Press the arrow key to stream live:

and a waveform looking like this:

Cricket sound slowed down to x0.19 original

Interestingly, what you hear on the playback isn’t ‘chirp-chirp’ at all; but ‘chirp-chirp-chirp’.  And it doesn’t help us, because each group of three sub-chirps only makes up a single one of our original chirps.  And there is no indication of a slower beat or modulation that would yield a lower chirp count.  My original estimate remember was 67, and if you count the groups on the expanded trace above you’ll find there are 13 in 15 seconds on the slowed down trace or, correcting for the factor of 0.19, gives us 68.4.  Virtually where I started.  The cricket still says it’s 107F when it’s only 65F.  (BTW – you can also hear another animal making an even faster noise in the background.)

Conclusion

In conclusion, accepting all the experimental limitations and caveats listed above, this test alone does not inspire confidence in the formula, and hence, the value of the tweet.

But hey, on the bright side we’ve all learned some possibly quite useless information about crickets, plus, more importantly, something of the pitfalls to watch out for in chronological cricket research (or any research for that matter).

Unlikely Ink?

oak galls
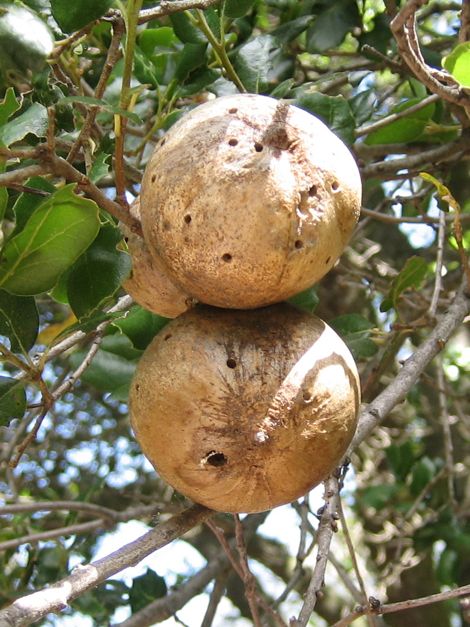
Oak Galls, Andricus kollari (I believe this particular tree is a Californian coastal scrub oak, Quercus dumosa.)(photo:Tim Jones)

A good few Zoonomian posts are based on things or events I just happen to stumble onto.  And that’s certainly the case with these oak galls I snapped on a trail walk this week.

These hard woody growths, about 1.5 inches across, are induced by insects interfering with the oak plant’s bio-chemistry.

Typically a wasp, like Neuroterus albipes in the photo, lays an egg on an oak twig, along with chemicals that react with the plant’s hormones to trigger growth of the gall, making both a home and ready meal for the wasp grub.   On occasion, secondary parasites of other species may join the ‘host’ grub after the gall has formed.  It looks from the multiple holes like that’s what’s happened here.

wasp
Gall Wasp (Wikicommons)

Historically, oak galls have been useful to humans as a main ingredient of Iron Gall Ink, in common use from before the middle ages to Victorian times.   I made iron gall ink as a kid, which probably explains why I got so excited when I saw these.  And while I’ll concede the skill is probably not a 21st century essential, making the stuff is quite satisfying.

So if you’re up for a little kitchen science, you will need: a handful of oak galls, some ferrous sulphate and, optionally if you want the ink to have a good consistency, some Gum Arabic.

The chemistry begins when the crushed galls are mixed with water, causing the tannin, or gallo-tannic acid COOH.C6H2(OH)2O.COC6H2(OH)3 in them to form gallic acid C6(COOH)H(OH)3H.  Adding hydrated ferrous sulphate FeSO4, 7 H2O  to this forms the ink, a soluble ferrous tannate complex.

As regards procedure, you should get a workable product by smashing up 5 or 6 oak galls and boiling them down to about a 1/4 pint in water and filtering the liquid through a cloth or handkerchief; then dissolve about a teaspoon of ferrous sulphate in a shot-glass sized measure, and mix the two together.  Instant medieval ink.   For a much more thorough and professional approach, see this article from the Conservation Division of the Library of Congress.  BTW – ferrous sulphate can be bought in art shops, garden supply stores, and some health stores – you want iron(II)sulphate, FeSO4 – not anything else.

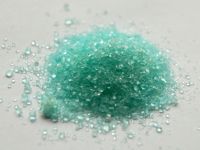
Ferrous Sulphate (Wikicommons)

The advantage iron gall ink brought over previous inks was its permanence. Because ferrous tannate is water soluble, the ink soaks into the paper, where the ferrous tannate oxidises to insoluble – and darker – ferric tannate, which is now trapped in the fabric of the paper.  Various refinements are seen in recipes, such as the addition of extra acid, maybe as vinegar, to keep the ink from oxidising in the pot, as it were.  A drawback of iron gall inks is their corrosive action, sometimes only apparent over a long period, and in extreme cases resulting in writing literally dropping out of the paper.

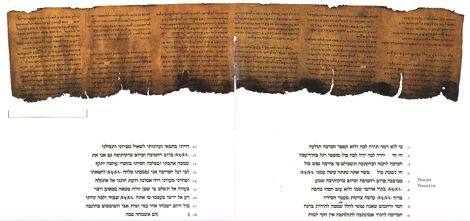
Despite the corrosion issues, many famous documents were written in iron gall ink, including the dead sea scrolls (the black ink that is; the red ink is cinnabar, or mercuric sulphide HgS), and the Constitution of the United States.

The Dead Sea Scrolls are written in iron gall ink (Wikicommons)

A Bone to Pick with Santa Barbara Museum of Natural History

Before heading back to LA from Santa Barbara last week, Erin and I made a final stop at the local natural history museum.  I’ve blogged before about how great this place is. Not the largest of museums, but somehow managing to cover all the traditional departments through locally themed exhibits – and all in the most beautiful location.

whale skull at santa barbara museum of natural history
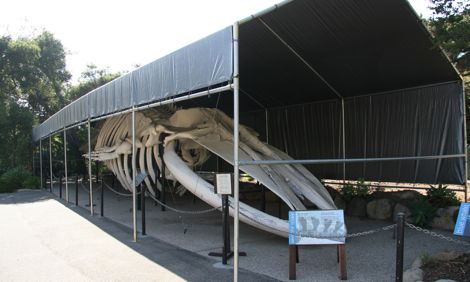
Whale skull at Santa Barbara Museum of Natural History, June 2010 (Photo:Tim Jones)

In the 18 months since our last visit, two new exhibitions have appeared, and the bird gallery has reopened following renovation.  But to our surprise, all that is left of the museum’s flagship exhibit – a 72ft Blue Whale skeleton – is it’s head.

The complete whale skeleton in 2008 (Photo:Tim Jones)

Santa Barbara Museum of Natural History
Nice spot..... (Photo:Tim Jones)

For the 20 year old skeleton, one of only five on display in the USA, is in need of a major overhaul.  The skull will be completely replaced, and the remaining bones will be refurbished or replaced.

The $500,000 needed to complete the work is being raised by inviting donors to sponsor individual bones and sections of the skeleton through the ‘Buy-A-Bone’ scheme (links to the Museum’s website).

The right to name this particular Balaenoptera musculus has already gone – for a cool $100k.  But the skull and vertebral column are still up for grabs at $75k and $137k respectively; most of the ribs are available at $25k each, the left flipper at $13k, or one of twelve carpal bones can be yours for the pocket money sum of $500.

So go ahead – pick your bone!

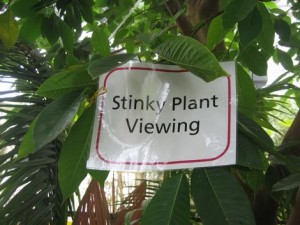
A Bit of a Stink at The Huntington

I’ve always thought I’ll someday meet a celebrity if I visit Los Angeles often enough; I just didn’t expect it would be a plant.

'Stinky' Amorphophallus titanum at the Huntington Botanical Gardens (Photo:Tim Jones)

Meet Amorphophallus titanum, or Titan Arum, or ‘Corpse Flower’, or simply ‘Big Stinky’ to it’s friends at the Huntington Botanical Gardens in Pasadena.

The deal with Stinky, one of the largest and smelliest flowers you’re ever likely meet, is that most of the time it keeps that outer petal-like spathe tightly closed around its central spadix.  Only on rare occasions, often with years between events, does the flower open up for a very short time, simultaneously attracting pollinating insects inside with a disgusting (to us) odour – hence ‘Corpse Flower’.

We’ve been following the plant’s progress on this Huntington blog, in a bid to time our visit to coincide with its opened, smelly, best.  As it turned out, having heard on Saturday it was blooming, we drove over today, Sunday, only to find it had closed up again; job done apparently: bad smells, insects, the lot.

Luckily, while I enjoy a bit of botany now and then, I’m not obsessive about it, so won’t be falling on my trowel any time soon.  But for some, I get the feeling it’s like an astronomer missing an eclipse or a transit of Venus.

You can see the plant wasn’t totally closed up (see the Huntington website for the plant in bloom) and we did get a sniff of a collected sample of it’s insect-attractant discharge; not pleasant, but I wouldn’t like to comment on its corpseiness.

So, an interesting diversion all the same.  And a good job by the Huntington marketing team; I’m sure they give Stinky a big hug when no-one’s looking.

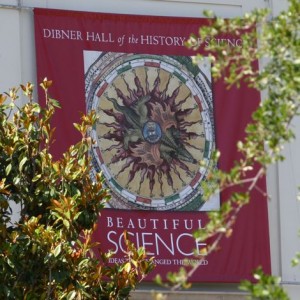
Moving on from smelly plants now.  This was the first time I’d visited the Huntington since the Dibner Hall of the History of Science was opened in late 2008.  The permanent exhibition, Beautiful Science, is wonderful, and you’ll find that doubly so if you like rare old books covering subjects ranging from astronomy to natural history to medicine and light.

Newton’s own copy of Optiks is here – how’d they get that?  And I liked the accurate reproductions of Galileo’s telescope that visitors can use to spy a simulated moon across the hall – moving their eye around to find the exit pupil like Galileo must have done; and Hooke’s microscope, with a genuine flea like the one Hooke so painstakingly drew in Micrographia.  There is even an original 18th century volume from Diderot’s Encyclopedie that the public can (carefully) leaf through.  Nice trusting touch.

All in all, the Huntington: comprising library, art collections, and botanical gardens, is well worth a visit.

They don’t build them like this anymore: The Gamble House

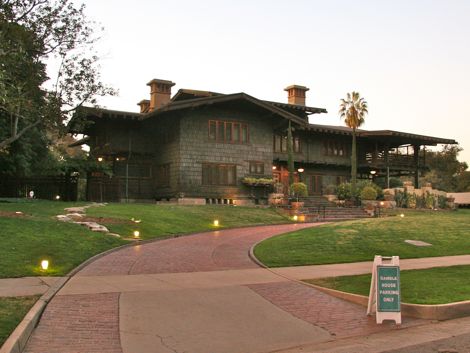
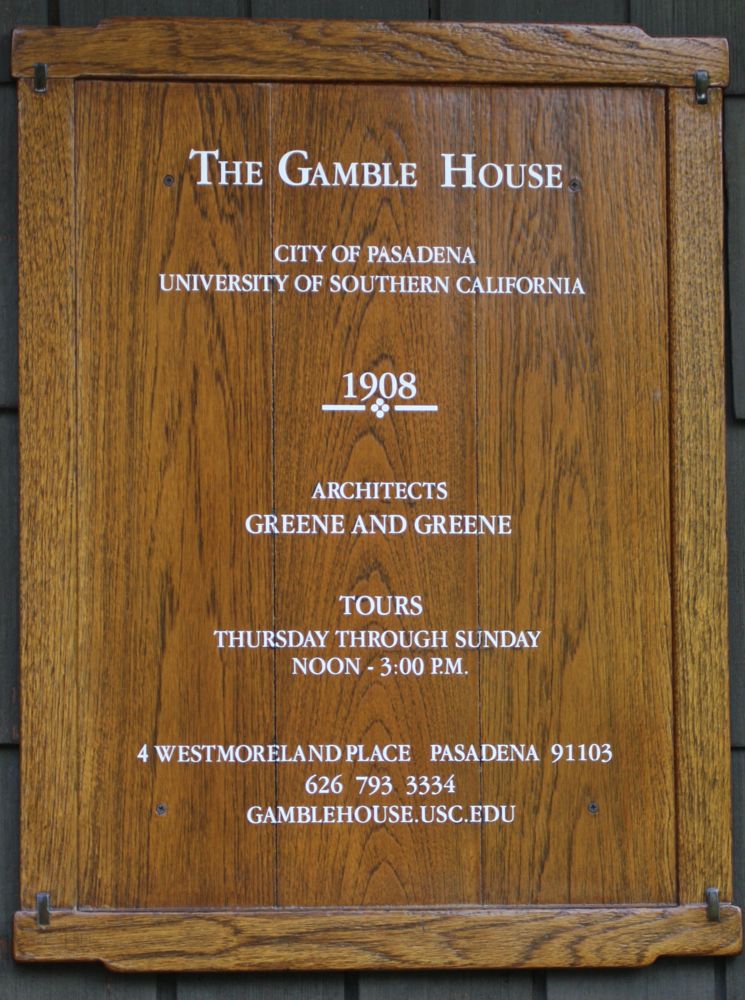
I’ve just taken a tour of the Gamble House – probably THE icon of American Arts & Crafts architecture.


The Gamble House, Pasadena (Photo:Tim Jones)

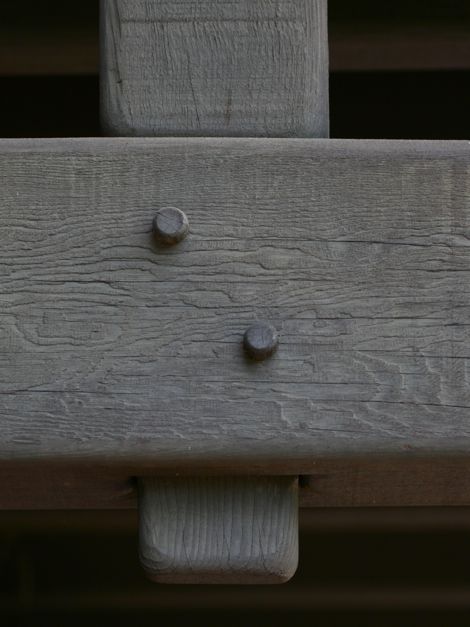
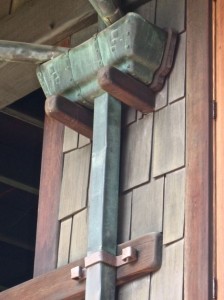
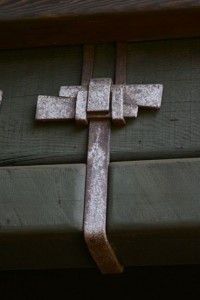
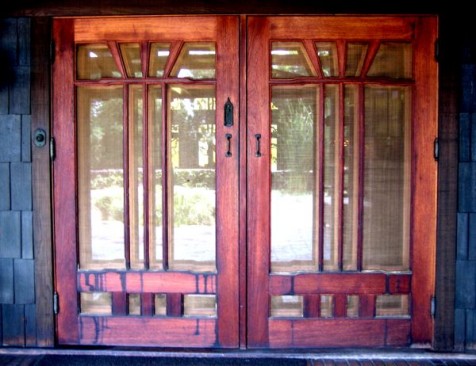
Designed and built as David Gamble’s (of Proctor & Gamble fame) winter retreat, this 1908 Charles and Henry Greene designed house in Pasadena is well worth a visit, for both it’s artistic and technological appeal.  No interior photography allowed, but here are some pics of the elegant joinery and fastening methods.

Construction is almost entirely in wood, with beautifully simple woodworking joints: lots of scarfs, laps, mortis and tenon (fingers), and pegs.

Our guide, however, put paid to the popular myth that the house is entirely without nails or screws.  Brass screws are used in the staircase for example, but cleverly hidden behind mahogany plugs (the tasteful predecessor of those cheap plastic caps that come with IKEA self-assemble furniture).

Scarf joint in the Gamble House (Photo:Tim Jones)

You’d also never guess that inside the supporting pillars are steel inserts that extend into the foundations; one of the first implementations of anti-earthquake measures.

Mortise and tenon joint, with pegs; in Gamble House (Photo:Tim Jones)


gamble house window

Gamble House window. Photo by Tim Jones

In 1908, the house cost $80,000 – roughly ten times the norm for a similar sized property – and took 20 people about a year to build.  It looks it.


Gamble House
Gamble House


Photos: Tim Jones and Erin Conel Jones

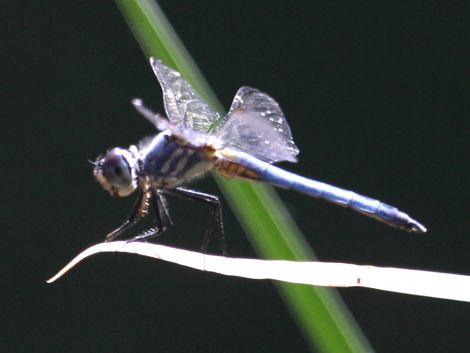
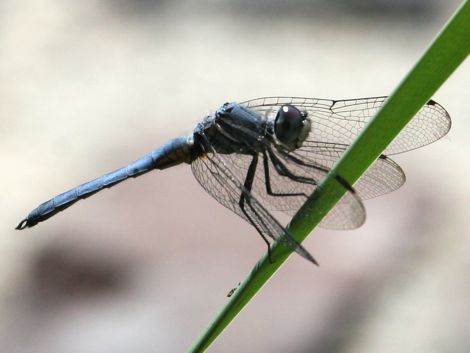
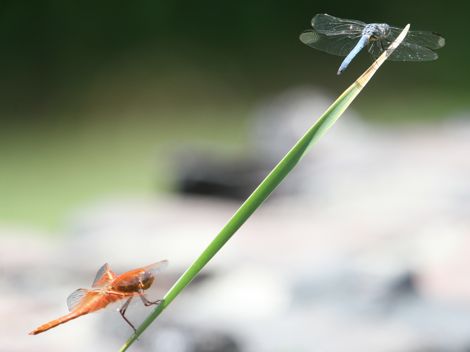
California Anisoptera (California Dragonflies)

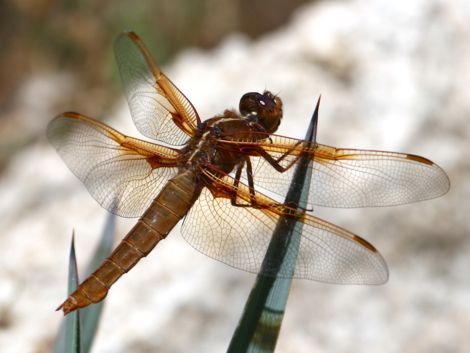
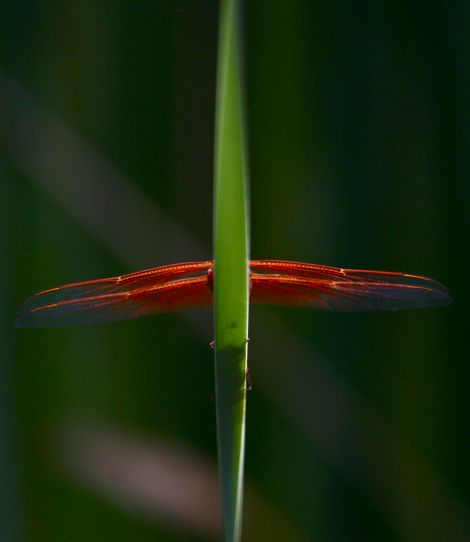
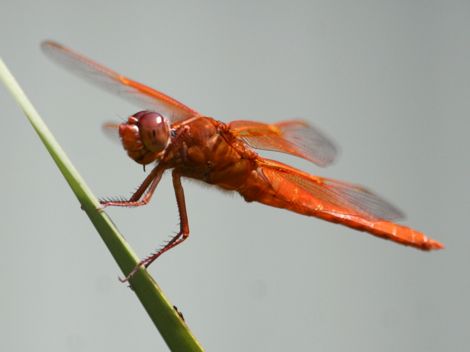
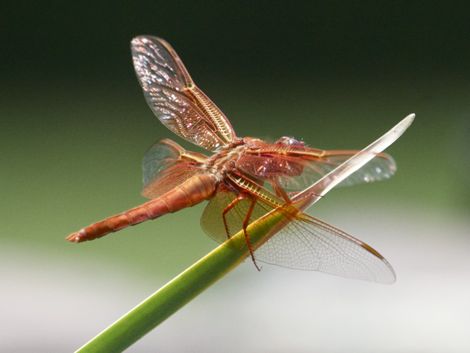
Just a few photos of dragonflies taken in and around the San Gabriel foothills.  There are three individuals here: the first golden-colored guy was taken in the hills; the other two were buzzing round a pond in Pasadena.  I believe the red colored one is a Flame Skimmer or Libellula saturata, the blue one is a Blue Dasher Pachydiplax longipennis, and I’m still working on the first guy.

dragonfly

dragonfly

dragonfly

dragonfly

dragonfly

dragonfly

dragonfly

Photos: copyright Tim Jones

Zoonomian Blog